Rube Goldberg Machine:
What is a Rube Goldberg Machine?
A Rube Goldberg Machine is a device that is created to do a simple task in a very complicated way using five simple machines, four energy transfers and ten steps. Our five simple machines were a lever, screw, incline plane, pulley, and a wedge and our goal was to pop a balloon. In order to achieve our goal our machine had to work. Our first step was the marble rolling down the incline plane, which then hit a lever. The force of the marble then tilted the lever, in which the marble rolled down another inclined plane knocking another marble into the screw which then fell into a cup activating the pulley system which then triggered a lever. This lever then released another marble which went down four different inclined planes knocking into a wedge with a nail which swung down, achieving our goal of popping the balloon.
A Rube Goldberg Machine is a device that is created to do a simple task in a very complicated way using five simple machines, four energy transfers and ten steps. Our five simple machines were a lever, screw, incline plane, pulley, and a wedge and our goal was to pop a balloon. In order to achieve our goal our machine had to work. Our first step was the marble rolling down the incline plane, which then hit a lever. The force of the marble then tilted the lever, in which the marble rolled down another inclined plane knocking another marble into the screw which then fell into a cup activating the pulley system which then triggered a lever. This lever then released another marble which went down four different inclined planes knocking into a wedge with a nail which swung down, achieving our goal of popping the balloon.
Here you can see our machine in action!
Project History:
Day 1: We decided the dimensions of our longest piece of plywood.
Day 2: We created a quick sketch of our machine and created a material list four our project.
Day 3: We created our original schematic.
Day 4-12: We constructed our machine.
Day 13-14: We created our presentation, calculations, and final schematic.
Day 2: We created a quick sketch of our machine and created a material list four our project.
Day 3: We created our original schematic.
Day 4-12: We constructed our machine.
Day 13-14: We created our presentation, calculations, and final schematic.
Calculations:
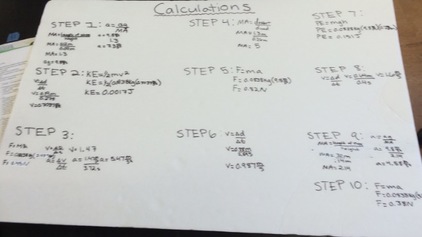
Step 1: The steel marble is released, rolling down the yellow incline plane,which then rolls onto flat plank with a copper wire "railing".
Step 2: The steel marble then tilts the blue lever with the help of a twenty gram weight which is on the lever.
Step 3: The marble then rolls down a white inclined plane knocking into another steel marble.
Step 4: The steel marble then rolls through a screw with a 540 degree twist which then deposits into a cup, which activates the next step.
Step 5: The cup then starts the pulley system which then tilts the purple lever releasing another steel marble.
Step 6: The steel marble rolls down the green inclined plane
Step 7: The steel marble then rolls down a much steeper hot pink inclined plane.
Step 8: The steel marble rolls down the black inclined plane with metal pipes creating
sound effects.
Step 9:The marble then rolls down a small sloped light pink incline plane.
Step 10: The steel marble then hits a wedge with a nail in it releasing it from it's position, which then falls and pops the balloon.
Below, are pictures of each individual step:
Concepts:
Force: A push or pull on an object. It is calculated by multiplying the mass by the acceleration. The third marble hits the wedge with a total force of 0.35N (newtons)
Velocity/Speed: Velocity is speed with a direction and speed is the rate at which something moves. They are both measured in m/s. In step eight, we found the velocity of the marble roling down the black inclined plane was 1.6m/s.
Acceleration: The rate of change of an object's velocity, measured in m/s2. The marbles acceleration is 7.3m/s2 down the yellow incline plane.
Mechanical advantage: How much easier something is made when using a tool. We found the mechanical advantage (MA) of the yellow incline plane (step 1) was 3.
Kinetic Energy: How much energy an object has due to motion, it is measured in joules (J). We found the kinetic energy of the lever was 0.0017 joules.
Potential Energy: How much energy an object has due to its' position, it is measured in joules (J) . We found the potential energy of the hot pink ramp was 0.151 joules (J).
Momentum: The amount of energy a moving object has. You find momentum by multiplying the mass by the velocity.
Reflection:
Building the Rube Goldberg machine has been a great experience and has paved the way for my following years of STEM. I really enjoyed this project and it has taught me a lot about how I work as an individual as well as how I work as a teammate. I learned the importance of patience and how it helps when working in a group. This project has taught me many life skills, including, staying focused and being more patient with others and help motivate them rather than get frustrated. I also discovered that when I am motivated and am not distracted by my phone I get a lot more work done. I need to improve on staying on task when others try to talk to me about unrelated topics and not turning to my phone to check on non-school topics. I should also improve on verbally showing my ideas to my classmates in order for us to collaborate on making our ideas, and making them successful! I believe, as a group, we worked really well together. Yes, we had our ups and downs but in the end we were happy with our product and with each other. We did have some complications in our project. For example I applied too much wood glue to our piece believing it would help make it firmer, when it actually made it weaker and took longer to dry. This was an issue because for the rest of the period we couldn't do any elaborate work in fear that the piece wasn't dry enough and would detach. Another problem we had to face was a calculation error. We drilled two holes too closely together, creating too tight of a bend in our screw for the marble to pass through without stoppage; we had to find a way to fix it. First we tried putting two sticks above and below the tube (screw) hopping it would help increase the slope, making it easier. This was unreliable because the marble would only pass through 5% of the time, so we drilled another hole. This hole was lower down and slightly farther away, making it easy for the marble to glide through without any problems. Many pieces of our project were very simple to put together, including the wedge and some of our inclined planes. All in all, our group worked great together and we were very happy with what we got done on our Rube Goldberg Machine!
